Prepare, Upload and Verify Files
Prepare Files
Files built to Abl's specifications will need to be created and shared with Abl based on the products purchased. Guides with file specifications will be sent to you by your Data and Support lead depending on the District SIS configuration.
Once the files have been prepared, you will have to transfer them to Abl's SFTP.DO NOT EMAIL FILES - You must use the SFTP transfer process in order to ensure student records are properly handled. These steps are outlined below:
Set Up an FTP Client
Your Client Success Manager will provide a username and password to your IT team to access your file directory to securely upload your files.
If your district does not have an FTP client in place, it will need to install one that supports SFTP. There are several free clients available such as FileZilla or WinSCP (Windows only).
After you have downloaded and installed the client program, use the credentials provided below and the provided username and password to connect.
Host: abl.files.com
Port: 22
Upload Files
Upload files to your district's home directory (you will only see your district) and use the Excel Comma Separated (CSV) format.
Verify Files
Log in to the Manage Data App:
Login using only using Google/Microsoft/Clever
Click on the waffle in the upper right-hand corner
Select Manage Data
Select your District
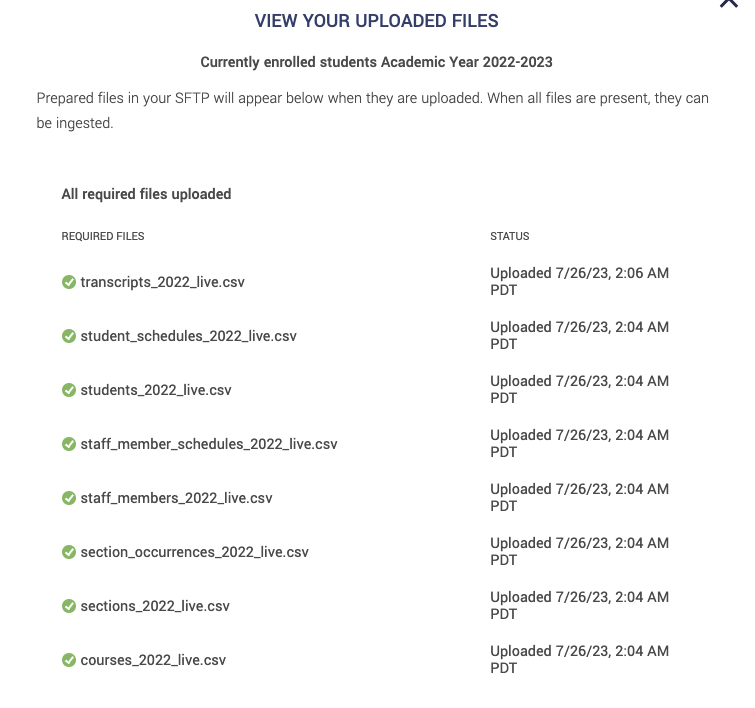
As a Flat File customer, you can view the files you uploaded by clicking on "VIEW YOUR UPLOADED FILES"
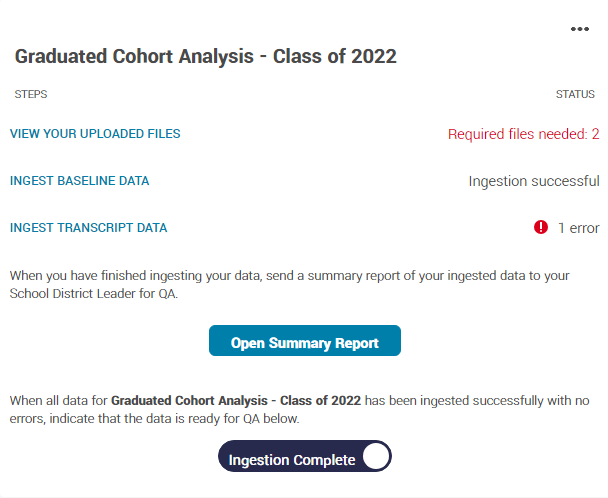
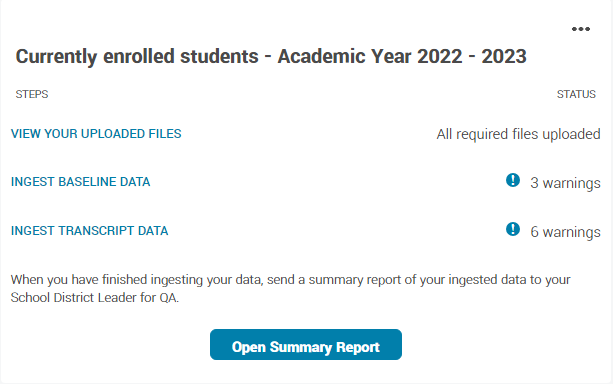
Locate the data set you want to verify required files are uploaded and ready to ingest. Your options will be:
Graduated cohort analysis (EOA)
Currently enrolled students (VisABL)
Schedule for the upcoming year (VisABL)
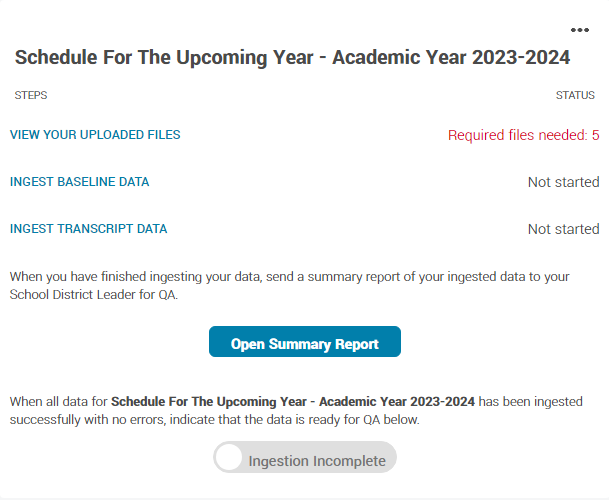
Click on "View your uploaded files" for that data set. The uploaded and missing files list will show on the right side of the screen:
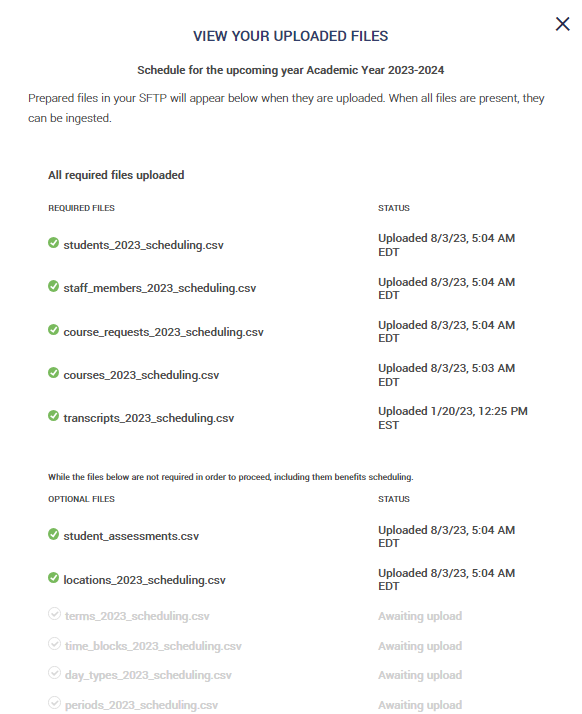
Review any missing files required and re-upload if needed.
Once all required files are uploaded, continue to the next step of ingesting your data.